Duo Administration - Self-Service Portal
Last updated:
Overview
Duo's self-service portal saves time for both administrators and end users by eliminating the need to contact IT staff for authentication device changes. Your users can add, edit, and remove authentication methods from the Duo Universal Prompt while logging in to protected applications.
Self-Service Portal Availability
The self-service portal feature is part of the Duo Premier, Duo Advantage, and Duo Essentials plans.
The self-service portal is an available option for Duo web-based applications, select VPN applications, Duo Single Sign-On and Duo Access Gateway applications, browser-based Microsoft applications, and any Duo applications that offer inline self-enrollment and authentication prompt via the browser.
Enable the Self-Service Portal
Role required: Owner, Administrator, or Application Manager.
Enable Duo's self-service portal on a per-application basis. To enable self-service for one of your applications:
-
Log into the Duo Admin Panel and navigate to Applications → Applications in the left sidebar.
-
Click an application's name to open that application's properties page.
-
The self-service portal configuration option is present under "Settings" if the application supports the self-service portal feature. Check the Let users manage their devices box to enable self-service for that application.

Click the Save button at the bottom of the application's properties page.
To avoid telephony misuse via the self-service portal, consider disabling phone callback as an authentication method or applying additional policy controls to the application, such as restricting User Location to your expected countries, or reducing your max credits per action telephony setting to only the credit amount needed for phone calls to your users' expected locations.
Customize the Self-Service Portal
Role required: Owner or Administrator
Apply Policies to the Self-Service Portal
You can apply a separate policy to the self-service portal within the Universal Prompt and Duo Central device management. This allows for stricter access while maintaining a different policy for normal application access. This policy applies anywhere you have enabled the self-service portal, except for the standalone, on-premises Device Management Portal application.
Access to the self-service portal is still enabled on a per-application basis.
To apply custom policies to the self-service portal:
-
Log into the Duo Admin Panel and navigate to Policies → Self-Service Portal in the left sidebar.
-
Scroll down to the "Policy" section of the page to apply policies at the application or application-group level, or scroll further to the "Global level policy" section to apply a custom user-group policy.
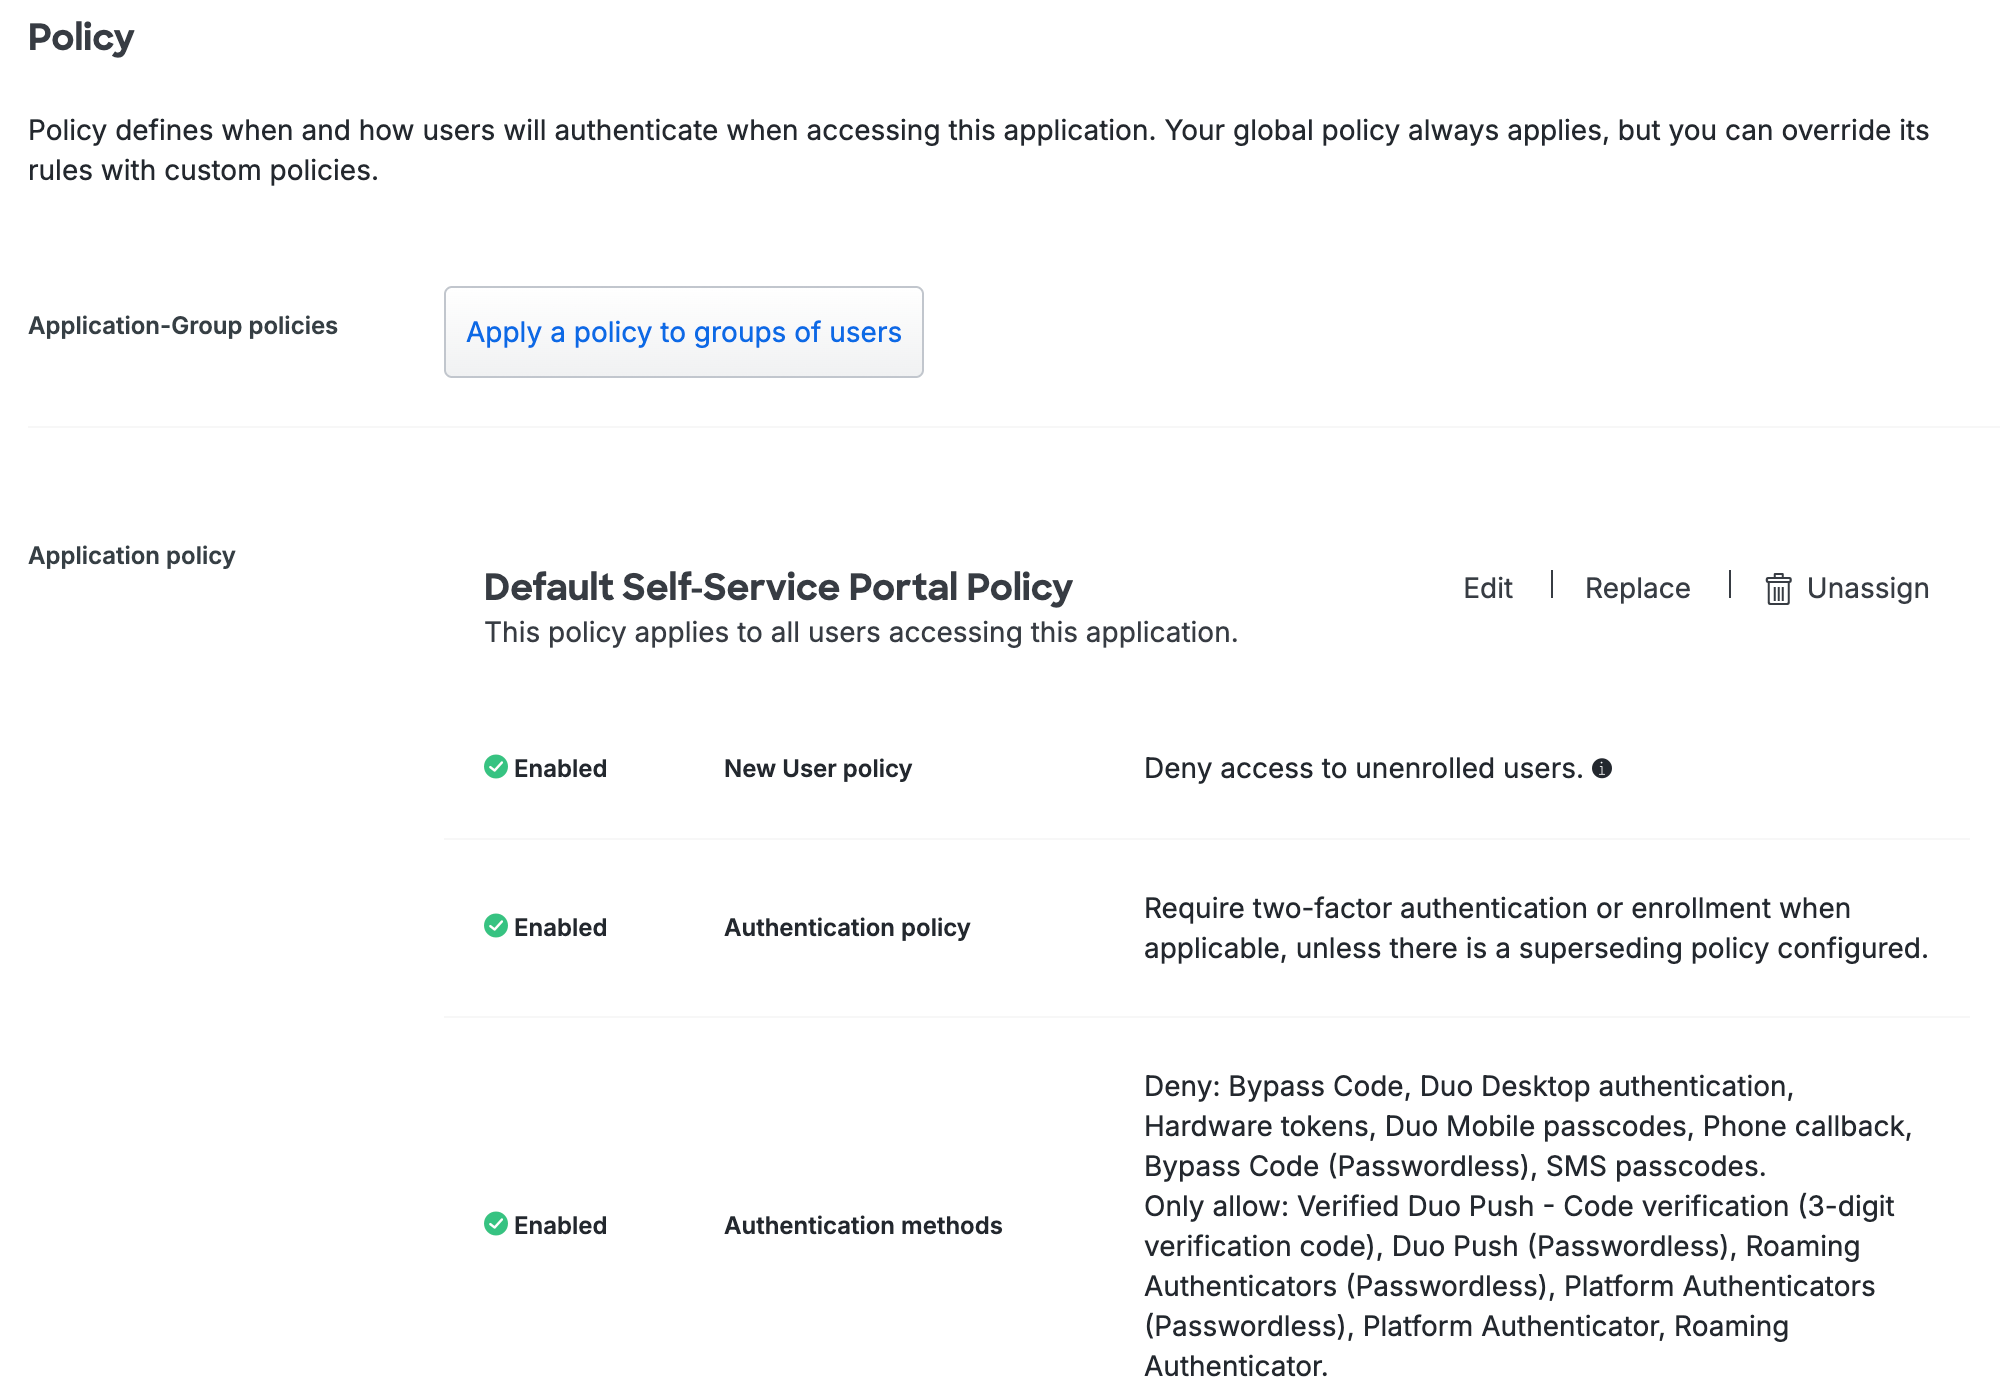
The "Default Self-Service Portal Policy" applied at the application level uses Duo's recommended self-service settings:
- New User policy: Block or deny access to unenrolled users.
- Authentication policy: Always require MFA.
- Authentication methods: Allow only these more-secure authentication methods:
- Verified Duo Push
- Platform Authenticators (MFA and Passwordless)
- Roaming Authenticators (MFA and Passwordless)
You may edit this policy as you wish to enforce more settings, like requiring Duo Desktop. You may also choose to unassign the default application policy, replace it with one of your existing policies, or assign more granular user-group policies.
Duo accounts created before February 2026 may not have a default application-level policy. Scroll down to "Policy" and click on Apply a policy to all users to apply a self-service portal policy for all users. We recommend that you enable the same recommended options in your application policy that we select in the "Default Self-Service Portal Policy" policy.
Your global policy settings take effect when the self-service portal has no application-level or user-group policies applied.
Learn more about custom policies in the policy documentation.
Edit Self-Service Portal Settings
The "Settings" section contains a subset of the same settings seen in a 2FA application's settings:
- Voice greeting
- Notes
- Administrative Unit
See application settings for more information about these settings. If you change any of these settings, click Save.
Self-Service Portal Policy Restrictions
Please note the following restrictions and limitations applied to the self-service portal:
- Users in bypass status will be unable to access the self-service portal.
- Remembered devices do not work on the self-service portal because users must always authenticate to manage their devices. Remembered devices policies applied to the self-service portal have no effect.
- The self-service portal ignores any other policy that could bypass authentication, and all users must authenticate (or the system blocks them if that is the effective policy outcome). These include:
- Authorized networks
- User location (you can use this policy to block use of the self-service portal, but not to bypass it)
- The self-service portal policy applies to access into the self-service portal only. Once a user has gained access, the authentication methods policy applied to the originating protected application determines which devices they may enroll. For example:
- If a user accesses the self-service portal while logging into the Office 365 application, the Office 365 application’s effective policy determines which authentication methods they can enroll.
- Duo Desktop as an authentication method cannot be used to access the self-service portal. Authentication methods policies applied to the self-service portal that enable Duo Desktop authentication have no effect. Make sure to enable an additional authentication method when applying a policy that enables Duo Desktop authentication.
Self-Service Portal Logging
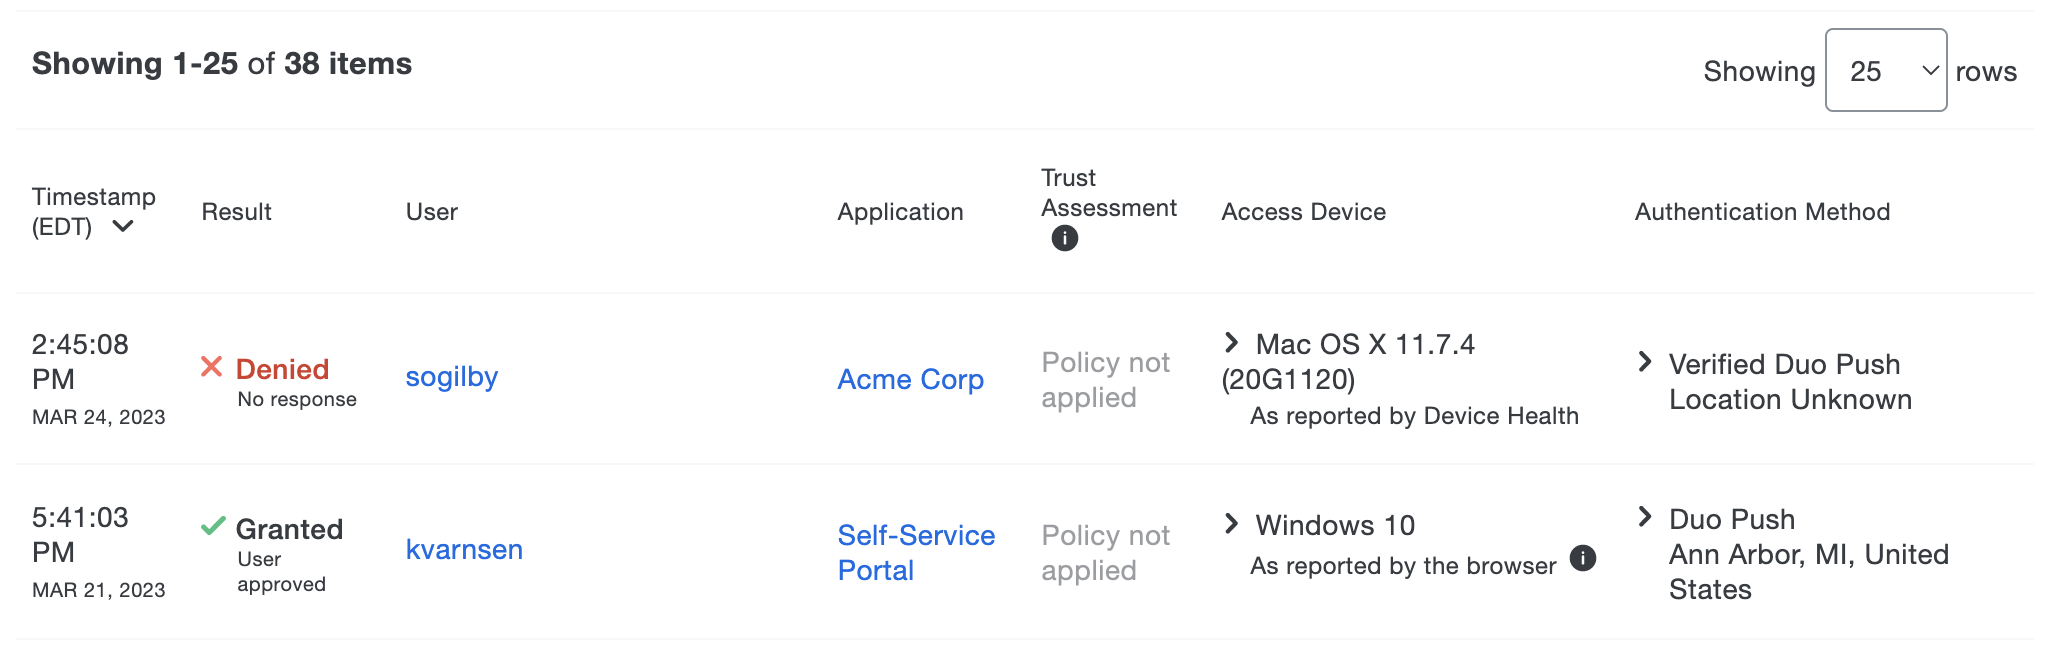
Once enabled, you can view when users access the self-service portal in the authentication logs.
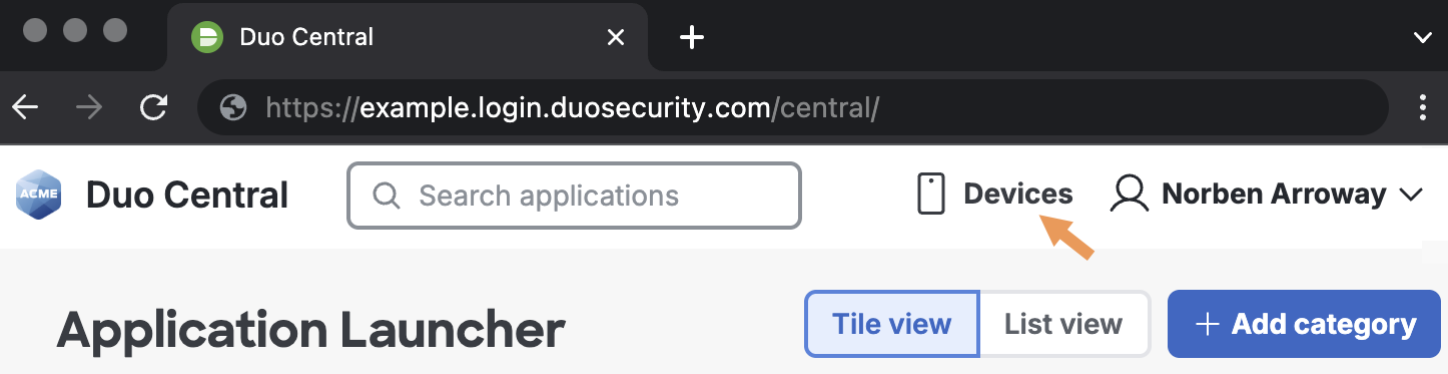
Duo Central Device Management
The self-service portal options for Duo Central, the application access portal for Duo Single Sign-On, provide users with access to device management after completing primary and secondary Duo authentication. Users self-manage devices from a convenient "Manage Devices" link in Duo Central, or from a standalone device management URL you can provide directly to users.
Learn more about configuring Duo Central with self-service device management.
Experience for Users
Universal Prompt
In the Universal Prompt, users can register Duo Push for a new smartphone or tablet, add WebAuthn methods like Touch ID on a Mac or security keys from supported browsers, or add a mobile or landline phone for SMS and phone call verification. They can also rename or remove an existing Duo Push, security key, Touch ID, or phone device. Users may remove (but not add) hardware tokens from self-service device management as well. With self-service enabled for applications using the Universal Prompt, it also offers users a streamlined process for adding additional passkey authenticators during two-factor and passwordless authentication when the device they initially registered isn’t available.
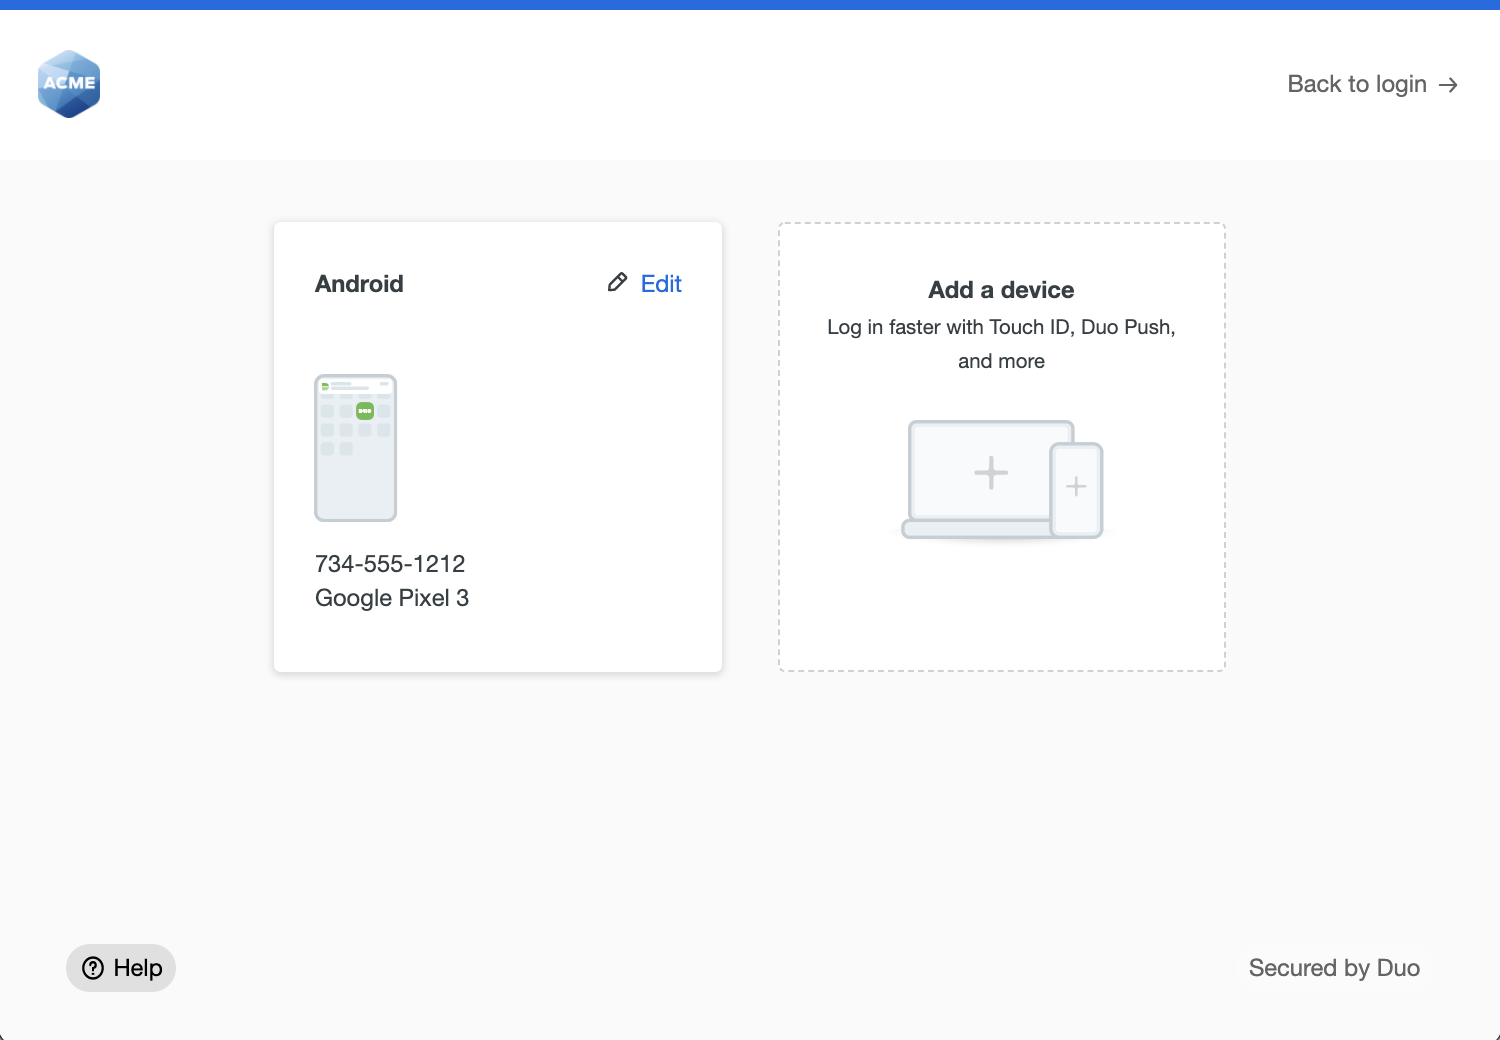
After passing primary authentication, users click the Other options link shown on the Duo authentication screen to return to the device list. The Manage devices option is at the bottom of the device list. Access to device management requires Duo authentication with an existing authentication method or a bypass code provided by a Duo administrator.

Users can rename or remove existing devices with the Edit options, or use Add a device to register another authentication device.
For additional information about device management from the Universal Prompt, see Add or Manage Devices After Enrollment in the Duo user guide.
Traditional Prompt
The iframe-based traditional Duo Prompt reached its end of support on March 30, 2024. Customers must migrate to a supported Duo application with Universal Prompt for continued support from Duo.
Learn more about the end-of-life of the traditional Duo Prompt and options for migrating applications to Universal Prompt and review the Duo End of Sale, Last Date of Support, and End of Life Policy.
Troubleshooting
Need some help? Try searching our Knowledge Base articles or Community discussions. For further assistance, contact Support.